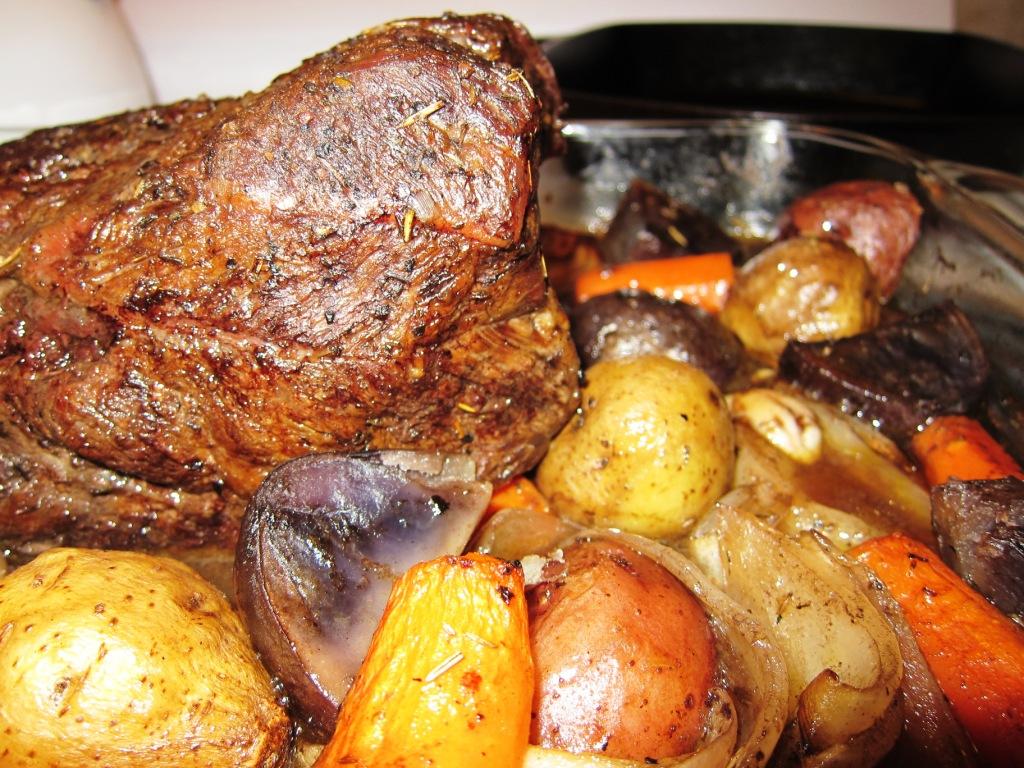
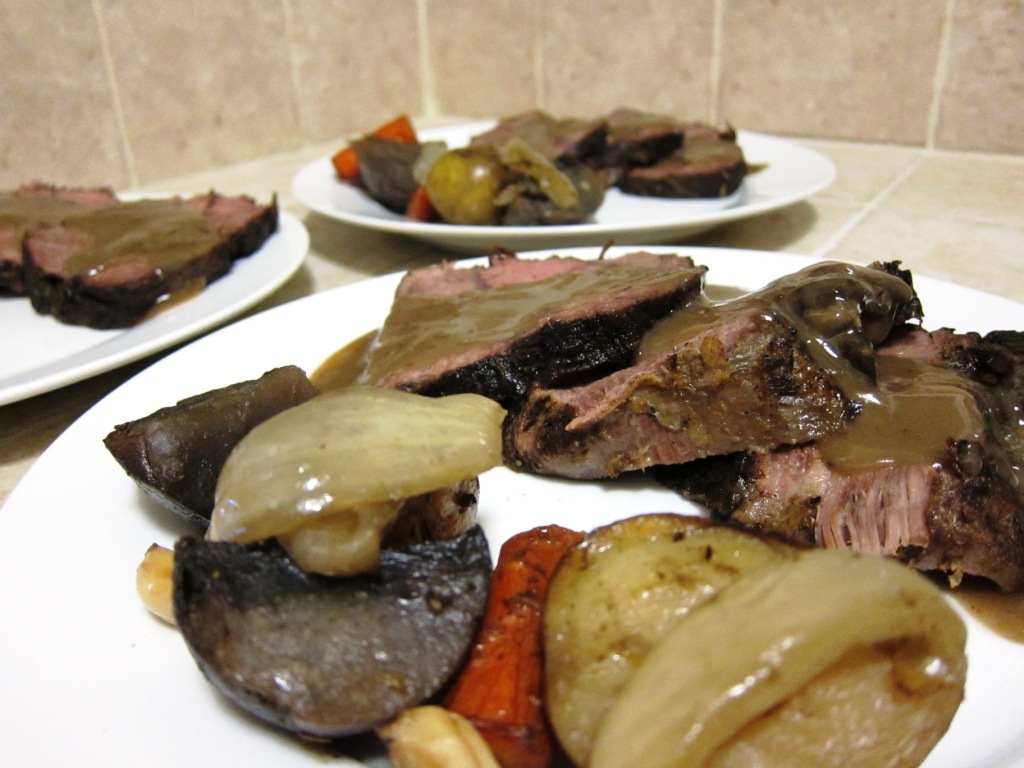
So, at about the 3 hour point of cooking this roast, I had given up on it. It didn’t feel right in the oven, it looked and seemed dry, and after a bit of Googling I discovered what I had done wrong (more on that later). I was a bit dejected. Even though the grand total of time and money spent on the meal was about $15 and 30 minutes prep, the smells of garlic, carrots, and potatoes braising in beef broth wafting through the house had set my expectations high. I began making the gravy with the idea that it would have to compensate for the lack of moisture in the meat. However, when I finally sliced and served it, I was pleased to report that I was completely off in my initial assessment. While I thought that the meal would be a C-, it turned out to be a B+ (and quite a delicious B+).
I’ll describe the problem more later, but suffice it to say that the quotations around the “pot” above are not only because I didn’t use a pot to cook it, but also because I missed out on some of the qualities of a pot (or better yet, a Dutch oven).
A pot roast (or really any slow roast) is usually made with cheap, relatively tough cuts of meat. We’re talking about chuck, top round, brisket, bottom round and the like. When in doubt, ask your butcher. Those guys (and gals) know meat. If you’re terribly shy, just look for a cut of meat that’s cheap (usually no more than about $2-$3/pound at the most expensive) and looks like it has a lot of fat running through it.
Well, not too much fat, because you’ll probably want to trim off the big portions that you can get to.
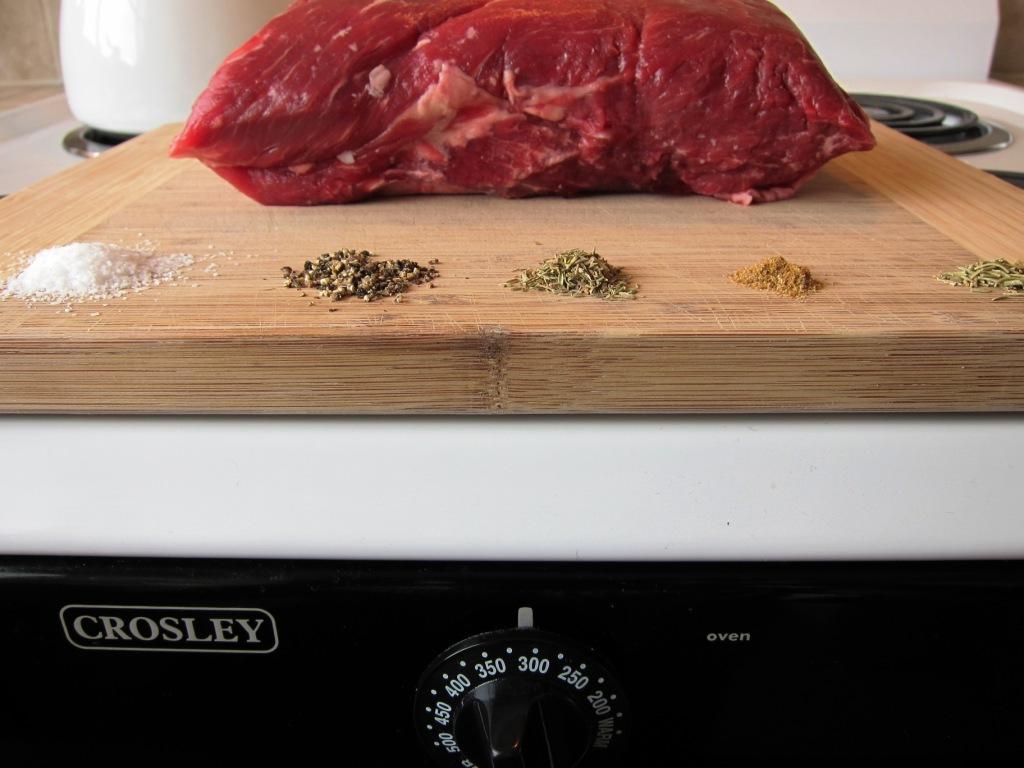
Once you’ve picked your cut of meat, the next step is the rub. Honestly, salt and pepper by itself is sufficient, but I always take any opportunity to add more flavor.
Then, well, you rub your dry rub in. You want it to stick to the surface of the meat, so feel free to give it a good deep tissue massage. Also, be generous with your seasoning, especially if it’s a thick cut. Then set aside the meat to chill for a sec while you take care of the vegetable accoutrement.
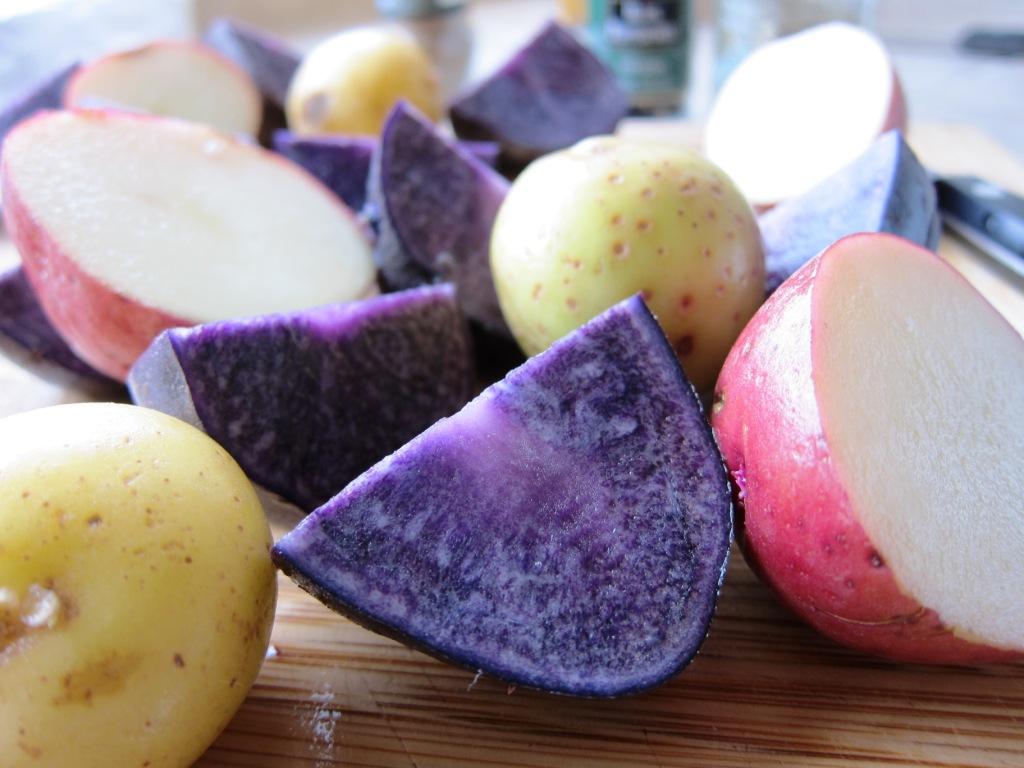
I went with the simple and traditional (well, for me at least) carrots, potatoes, onions, and garlic. I got the potatoes at the farmer’s market and man, they are both delicious and beautiful. I got gold, red, and purple potatoes. As for the purple potatoes’ nutritional value, I’ve heard rumors that they have a low glycemic index and high levels of antioxidants, but nothing concrete. Well, nothing concrete after an incredibly cursory search. However, even if they offer no additional nutrition, the visual variety is reason enough for me to buy them.
Oh, and while I’m on the subject, I posted a similar picture to the one above to Reddit and learned something quite interesting about carrots. It turns out that carrots exist in a wide variety of different colors and different colored carrots used to be much more common. However, in the 17th century, orange carrots began to become much more prevalent. The reason is supposedly because Dutch farmers decided to breed orange-r carrots (they didn’t know it, but they were selecting for higher levels of carotene) in order to honor William of Orange (a.k.a. “William the Silent”… not to be confused with William of “William and Mary” fame) who had led the Dutch revolt against Spanish rule.
So, carrots are orange for political reasons. (Source: Next Nature)
Even if the story is apocryphal, I choose to believe it. And if anyone can tell me where to get differently colored carrots in San Francisco, I would greatly appreciate it. And now, back to our roast.
Chop up your vegetables. A good general rule is golf ball sized pieces for the potatoes and onions (yes, I realize you can’t make them perfectly spherical), thumb sized for the carrots, and the whole clove for the garlic. A better general rule is that everything should be roughly the same size so that they cook evenly.
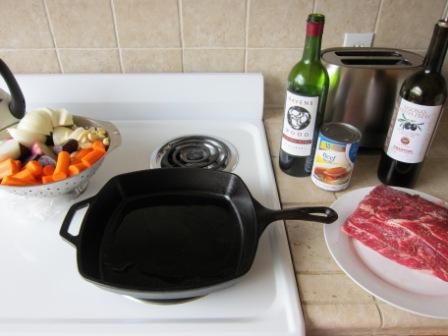
Now, you want to get everything ready so that you don’t have to be scrambling around to find items you need. Have your rubbed roast, your chopped vegetables, AND some wine and broth ready to go. For the broth, I used beef broth, but I really don’t think using chicken broth or even water would be the end of the world. Alternately, you can use stock if you want a really rich pan sauce/gravy. See, the difference between the two is that broth is made with the meat, but not the bones, whereas stock is made with bones which gives you the delicious gelatin that creates that “sticks to your ribs” feeling. However, we’re going to already be breaking down the collagen in the roast into gelatin already by cooking it low and slow, so broth or water is just fine.
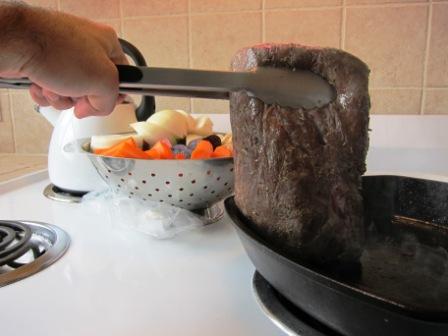
The first step is to brown the meat. While this step isn’t strictly required, I can’t imagine why you’d omit it and you would lose the delicious flavor that browning adds, the fond (delicious pieces of meat sticking to the pan with which you can make your pan sauce), AND it just looks better. Do it on all sides until it’s a dark brown without burning. I use my cast iron skillet for this because it holds heat much better. A regular pan is just fine as long as you can get it HOT.
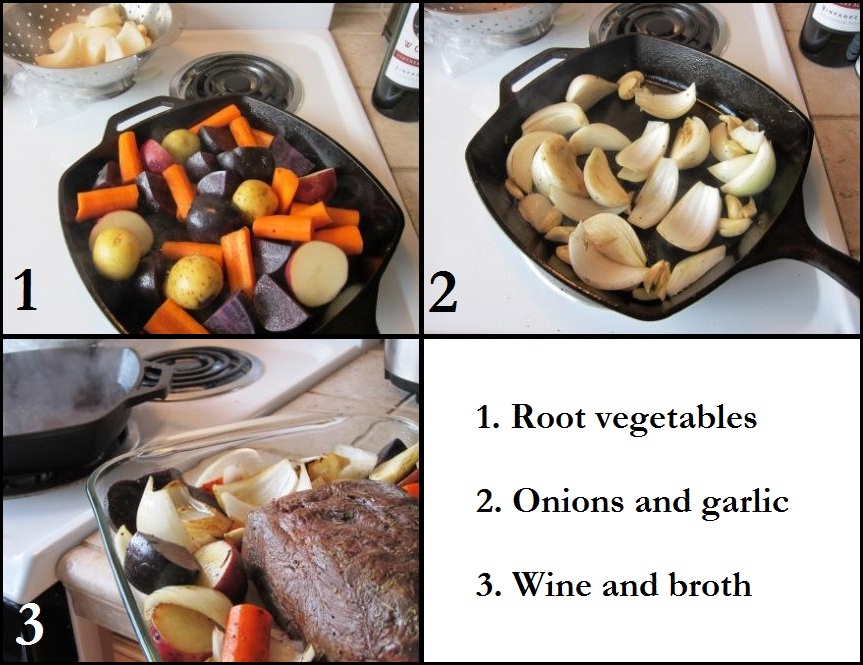
When that’s done, transfer it to a pyrex dish and add your vegetables to the same pan. I usually start with the potatoes and carrots, mainly because of limited space in the cast iron skillet, but even if I had a huge pan, I would probably let them cook a bit longer than the onion and garlic. Again, this step isn’t strictly required, but a little browning goes a long way.You’ll need to keep adding oil to the pan to keep them from sticking.
You don’t need to do anything in a specific way to make a roast great besides cooking it low and slow.
The browning adds flavor and aesthetic appeal, so I never skip it. I brown all of the vegetables, then arrange them around the roast in a pyrex dish. Now it’s time to get all the bits off the bottom. I usually use about a half cup of red wine to deglaze the pan. Use your tongs or another utensil to scrape up the bits of meaty and vegetable-y goodness from the bottom. Then let the wine reduce by a bit (it’ll come to a boil almost immediately). This part can get messy, so use an oil guard if you have one. Oil is one thing, but splatters of red wine have ruined more than one shirt of mine while deglazing. Then add a can of broth or stock. Alternately, you could use water, but why not add more flavor?
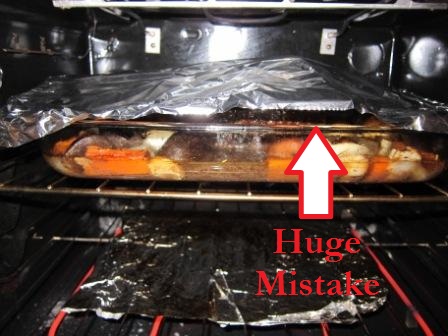
When the meaty bits have been scraped up and the the liquid has come to a boil, pour it over the roast and the vegetables. Now here’s where I made my HUGE MISTAKE. I should have crimped the foil as tightly as possible over the pyrex dish, but I just did a half-hearted job. The reason is that the roast needs to cook in moist heat the entire time to help break up all of the connective tissue. The way I did it was to kind of loosely put the foil around without making a tight seal. This allowed steam to get out and hence didn’t get to the falling apart state I love so much in a pot roast.
To get a bit technical here, this isn’t actually a pot roast, because well, it isn’t made in a pot. I made it in an oven, so it’s more of an oven roast. Now here’s where it gets confusing… the best type of pot to make a pot roast in is a dutch oven. A dutch oven is a cast iron or ceramic cooking vessel that is designed to hold high heat. If you get one with a tight fitting lid, you can trap all of the steam in and even make it on the stovetop for an authentic “pot” roast. I’ll probably be purchasing a Lodge dutch oven because the general consensus seems to be that you get the best bang for your buck with one of them. However, I am torn, because ceramic would be nice because then I would have a non-reactive, thick walled pot. But, I digress.
Your job in making the roast is pretty much done except for making the gravy at the end. Let it cook for about an hour per pound or when your vvegetables are nice and tender (whichever comes later). I let this roast (2.91 lbs) cook for about 3 and a half hours.
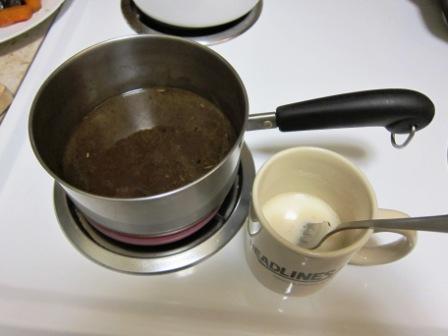
When it’s done, take out the meat and rest it on a cutting board. The vegetables should be removed from the liquid as well. These can be set aside on a serving plate. Then, pour the amazing remaining liquid into a small pot. I call it amazing, because I love it so much I could bathe in it. I sampled it so often throughout the cooking process (yes, shame on me for letting steam escape) that I’m surprised any was left at the end. It’s the equivalent of cookie dough to me. Anyway, put the pot with the pan liquid on a burner and set it to medium. While it’s starting to get to a gentle boil, get a cup of cold water and add some flour. You want to make a solution of cold water and flour that you’re going to use to thicken the soup. Make sure you get all of the lumps out before you add it to the gently boiling pan sauce. Then add a little bit, stir it until it’s all combined and repeat the process until your gravy is thick enough for your tastes. However, it will thicken more as it cools, so make sure that it’s not too thick. Also, keep tasting to make sure that it’s not too flour-y. I also added a bit of salt and pepper here and, as an experiment, a little bit of liquid smoke. In this case, a little bit was about a half of a teaspoon, because I wasn’t sure how good it would be. I think it was an appropriate amount, but I might go for a bit more next time.
By the way, this same technique can be used to make pretty much any gravy. I learned this technique from my dad who uses it to make a killer giblet gravy for turkey every Thanksgiving.
Then, slice the pot roast. I like thick slices, but you can cut them as thin as you’d like. I cut them a bit thinner than I usually like because the result was drier than I’d like. However, the collagen had broken down into gelatin which produces that wonderful sticks to your ribs’ taste and feeling, so like I said, it was an overall B+.
“Pot” Roast



4 Trackbacks/Pingbacks
[...] It can be hard to clean, because you can’t really scour it because it will remove the seasoning. The seasoning is the layer of grease baked into the pores that makes the pan non-stick. However, it can be really hard not to want to scrub it, because little bits of food can really get stuck onto it, especially if you’re using it in the oven. In this case, it was from caramelizing the vegetables for pot roast. [...]
[...] made pot roast with au jus (and definitely hit none of the snags that I did), creamy mashed potatoes, sweet and savory green beans (cooked with almonds and brown sugar), a [...]
[...] can write about goat cheeses, roasts, and prosciutto because he can. He lives in San Francisco, which is the place to be if you like [...]
[...] – add more BBQ sauce and/or add cornstarch or flour solution and/or cook longer (you run the risk of overcooking the [...]
Post a Comment